How to contribute to a GitHub project via pull request (Open-Source / Private Repository)
Learn how to use Forks and Pull Requests to contribute to git projects where you can't push directly to

I'm a software engineer and computer scientist now a Deep Tech "super angel" and founding partner of the VC fund Silicon Roundabout Ventures
Whether you're looking to contribute to an open-source project or to a private project where you don't have write permissions, the way to do it is the same: using your own fork.
Here is how.
TL;DR
If you joined a new open source project or a new development team working on a private repository without single-branch permissioning, it's very likely that you won't get direct access to push commits or branches up to the repository itself.
So, instead, you'll fork the repo, make the changes on your version of the repo, and then "pull request" your changes back to the original.
If you want to check out the individual steps, keep reading.
1. Fork the repository
Let's use the next.js project as an example. First, visit its page on GitHub, and click the "Fork" icon in the upper right of the page.

You now have a fork of the project under your own user account.
2. Clone it locally
Next, clone your forked version down to your local machine.
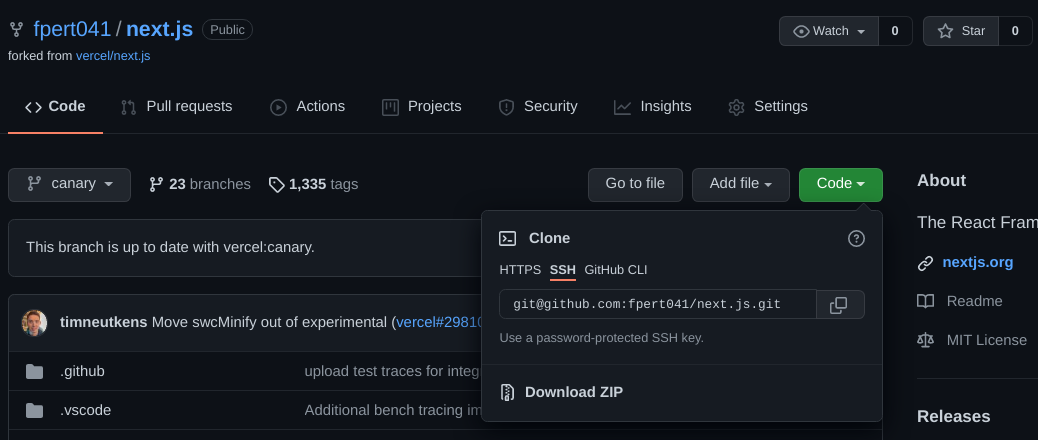
In the example case I will be typing in terminal: git clone git@github.com:fpert041/next.js.git ─I personally use SSH to clone but you can use whatever method you prefer.
Note: If the Fork option is disabled, you need to tell the organisation to enable forking for that repo, in Settings >> Options >> Features. If the repository is private, they will need to make sure to enable also forking for private repositories for the organisation as a whole.

3. Keep it in sync with the source
Since you will probably want to contribute over time, you need to make sure your fork is in sync with the original.
To do that, add the original as a remote:
git remote add upstream ORIGINAL-REPO-URL
So in my example, I would type in terminal: git remote add upstream https://github.com/vercel/next.js
TRY IT! ─If you check your remotes (git remote -v), you can now see that you have two "remotes" that your local repo is pointed towards:
origin, which points to your repo, andupstream, which points to the original. It's all normal, bear with me :)
4. Spin up a branch
You will probably want to branch from whatever the project's default branch is. This is often main or master, but in the case of next.js it's canary, at the time writing.
Depending on the project, there might also be a specific branch developers should be aiming to push to (E.g. a "development" branch).
Make sure you're on the branch you want to track and that it's up-to-date with the source repo. If you just forked it, it always will be —but if there have been a lot of changes to the original repo since you forked it, yours might be out of sync.
This is why we wanted our forked repo to track the original repository as the upstream. Now, let's see how to get a repo in sync. We will be using canary as the example name for the branch we want to eventually contribute to:
git checkout canary
git fetch upstream
git merge upstream/canary
git push origin canary
Now you can spin up your new branch:
git checkout -b my-feature-name
5. Edit, Open Pull Request, Merge
Let's assume that in our example, we created a branch called fpert041-patch-1
Pro Tip: Don't do that, use a telling name instead!
We now want to make all the changes we want on our local branch, then commit, then push to our Forked remote.
git commit -m "Commit Name"
git push origin fpert041-patch-1
Note: If you are only making a small improvement and you are part of the development team of the project, you can make your changes directly to the chosen development branch, then commit and push to your Forked repo, without branching out. The reason why, in most cases, you DO want to create a sub-branch, is because, if your Pull Request is not quickly merged into the original repository by the maintainers, you can still pull any new changes made to the original branch without having to merge all the time. Also, creating separate branches to deal with specific improvements or issue patching helps create better history tracking.
Now, you can create a pull request in the GitHub user interface. Visit your repo on GitHub and click the "New Pull Request" button, and you can create your PR from there.
In our example, we can open a Pull Request with the canary branch of the original next.js repo and submit the request.
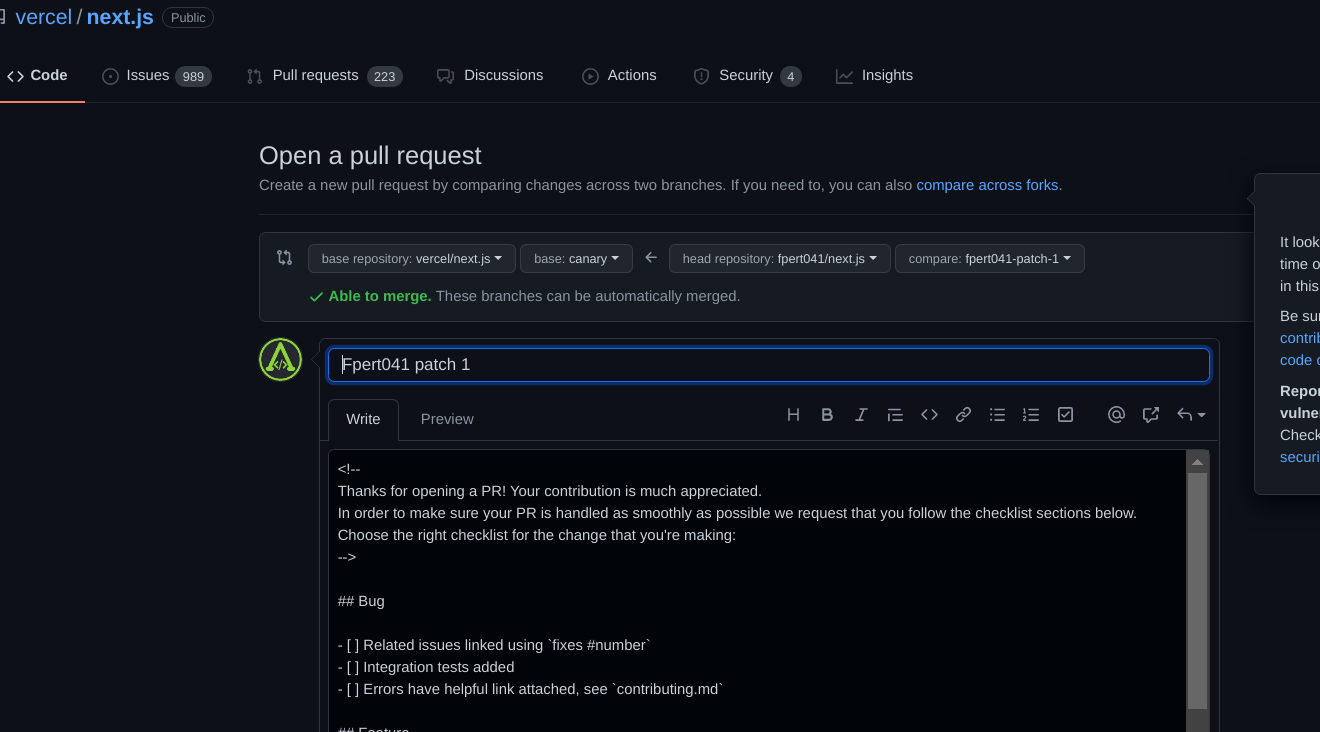
In the real world, please make sure to explain the purpose and context of your Pull Request. This will allow reviewers to understand it and quickly check for approval. See GitHub's guide on How to write the perfect pull request.
That's it! The pull request will show up to the maintainers of the original repo and they can take it from there.